November 7, 2011

Tutorial - My Halloween Jack 'O' Lanterns

Family Fun that everyone will enjoy.


Here's an easy & fun way of turning your oranges into the perfect yummy little Jack 'O' Lanterns for your next Scary party or Halloween Night.

(This recipe comes from Woman's Day kid's Cooking book &
 I have adapted it to give it that jack 'o' lantern look)
You'll need:
> 4 Oranges
> 1/2 cup caster sugar (superfine sugar)
> 3 teaspoons gelatine
> 1/2 cup just boiled water

Adjust quantity as suited.


Step 1. Cut the tops of your oranges off approximately 1/4 of the way down. This will create the lid & the body of your little Jack 'O' Lanterns.


Step 2. Juice & strain your oranges halves & quarters into a jug.  Being careful not to rip or tear the skin of your orange. (I like to strain my juice twice just to make sure I've got not hidden pulp).


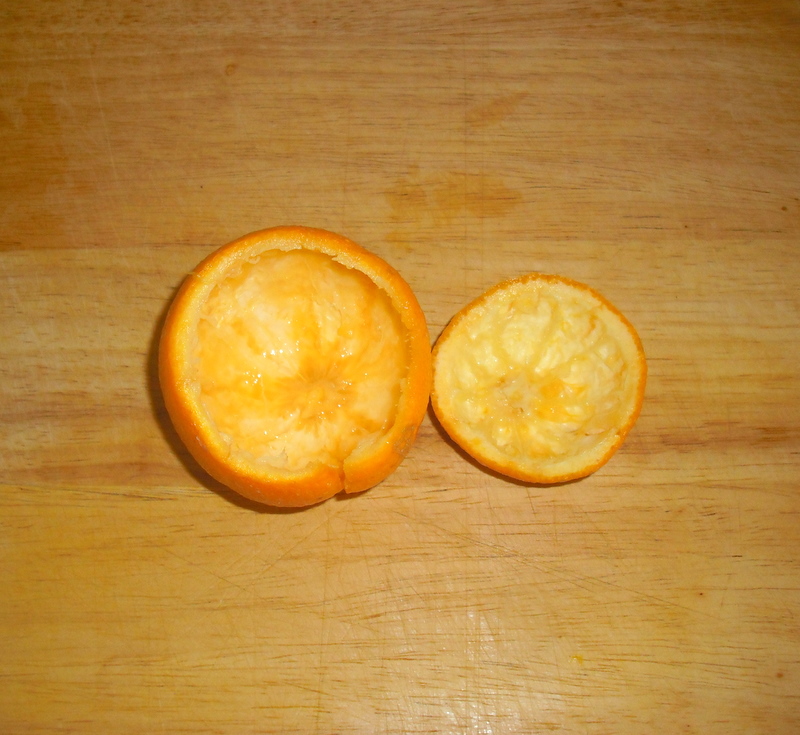
Step 3. Scrape flesh from the skins, again being careful not to tear the outer skin (I have a little tear in the photo above oops!!! ).   Place the skins in a bowl & cover with boiling water. Stand for 1 minute before draining & rinsing under cold water.  Place on a wire rack & drain.

(My little tip that works well for me: rinse under running water whilst removing the last of the pulp/flesh. I find this easier for getting it out without tearing the skin & then follow with the draining on the wire rack).  


Step 4. In a small saucepan, combine your freshly squeezed orange juice & sugar. Stir over a low heat until the sugar dissolves.  Once sugar has dissolved bring to the boil over high heat. 
Reduce heat to low & simmer for 10 minutes.


Step 5. Place your orange halves & quarters in the recess of your muffin pan.
In a small jug, using a fork, whisk  gelatine briskly into the just boiled water until dissolved.  Remove from heat.  Blend gelatine mixture into orange mixture in pan.  Pour into orange skins.


Step 6. Chill for 3 hours or overnight until set.


Step 7. Carving your Jack 'O' Lanterns Face.  Taking a small sharp paring knife, start cutting out your Lanterns eyes by making small triangular incisions. Being careful not to cut to deeply. You want to make sure you only take out the skin & not your yummy jelly inside.


Step 8.  Continue carving out your sweet little Jack 'o' Lanterns until you've made his complete face. (Remember to make sure you are flicking the orange skin carving outwards & not pushing them back into the jelly.


My little guy is happy now he has a mouth.
Step 9. When carving his mouth, it's easier to make a series of 3 triangular peaks along the top & then one long continuous straight cut along the bottom.  But of course the ideas are limitless & are up to your own imagination. 

  
Ta Dah.....Our finished little guy.

Instead of the orange jelly, you could also try orange sorbet. Follow the above methods, & instead of adding the jelly, pop in a few scoops of your favorite ice-cream or sorbet & then place in the freezer until ready to serve.  
Your kids are going to love these & the adults wont mind trying one either...

 Enjoy 

Kiddilicious xx


November 1, 2011

Happy Halloween 2011

Here's a little sneaky look into Halloween at our house this year.

My Scary Little Trick Or Treaters

Skulls, Spiders & Cloches 


Treats if you dare


Spooky Spider Web CookiesPrintables: Catch My Party

Vanilla Cupcakes
Printables: How Dose She


My cute Oranges disguised as orange jelly filled Jack 'O' Lanterns  

Halloween Loot for my favorite little horrors
filled with teeth, worms, witchity grubs, frogs  & lolly pop spiders


Our Spooky Treats


Ready for terrorizing the neigbourhood
Goodies & treats for our visiting little Trick or  Treaters


Hope you enjoyed having a look into our Halloween Night


Kiddilicious xx

October 2, 2011

Christening Time

A Gorgeous Friend of mine recently styled a beautiful Dessert Table for her son's Christening. I just LOVE the Pure Simplicity that this table brings.  The crisp clean colour palette of baby blue & white was the perfect combination for this little man's special day. And to top it off, this clever friend handmade just about all that you see and it was all organized and put together in just one week.  AMAZING!!!

Dessert Table

I love the added touch of the butterflies to the lanterns
(a favourite of her son's)


Beautifully put together Bombonieres

Delicious cupcakes with handmade fondant crosses

Scrumptious Cake Pops


Christening Cake by Design a Cupcake

Christening Tablecloth by Kiddilicious

A Huge Thank You to my Gorgeous Friend for allowing me to share 
her Son's very important and special day here with you all. 

I hope you enjoyed it as much as I did sharing it.
xx

Kiddilicious


July 17, 2011

We Have A Winner

It's with great pleasure to announce that the Winner of the Kiddilicious Facebook 1000 Liker Giveaway Princess Tiara Bracelet is.......................comment number #6   (as seen from my blogger page).


Congratulations
 
  Nicole Dugo
 I hope that you and your chosen Princess will delight in your winning gift.

A Huge Thank You:
I'd also like to take this time to thank each and everyone of you for taking the time to enter this competition and for your continued support of Kiddilicious. Without you all, kiddilicious would not be where it is today. I'd also like to extend an extra special thank you to those of you that have taken the time to promote kiddilicious and share the LoVe!  It's this kind of support that will help kiddilicious to grow and to continue with it's success.  So again it comes from the bottom of my heart to say that you are ALL highly valued by ME.  Many, Many thanks.
And CHEERS to you ALL!!

Kiddilicious x

July 12, 2011

"Giveaway"

Let’s Celebrate

In celebration of kiddilicious reaching 1000 likers on Facebook, as promised it is now time for a wonderful giveaway.


Your special girl will adore this Princess Tiara Jewel, leading her right into her very own fairytale.  Sparkling with beautiful rose pink Swarovski Crystals & Sterling Silver beads. Adorned with the most adorable sterling silver tiara charm & featuring a 1" heart extension chain so that your Princess can keep on wearing her very own fine fashion piece for years to come. All handcrafted by kiddilicious onto a strong silver plated beading wire.

One Lucky Winner will be able to choose from the following size chart:

5.0"   12.7cm (approx 12-24 Months)
5.5"   14cm    (approx 2-4years)
6.0"   15 - 15.5 cm (approx 5-7 Years)

6.5"   16 -16.5   (approx 8 Years+)

Remember Sizes are approximate due to beading size combination.

(Please be aware that beading combination will vary due to the size chosen)

To Obtain A Proper Wrist Measurement: Simply use a flexible measuring tape or  piece of string/ribbon and place around the wrist area. Align string/ribbon alongside a ruler or measuring tape to get wrist measurement. For children, add 1 to 1 1/2 cm to wrist measurement to get proper sizing. Example: If my child's actual wrist measures 12.5 cm, I would add 1 - 1 1/2cm to get her bracelet size, which would measure 13 - 13.5 cm.


OK! Now How To Enter:

Entry into this competition has been made simple & easy

1. All entrants must be a LIKER of  kiddilicious on facebook.
2. All entries must be made on this blog (not on facebook)
3. Leave a comment here saying that you'd love to win the gorgeous Princess Tiara Bracelet & that's it.
4. Now sit back, relax & wait for your name to be drawn. : )   DONE!

Now the Boring Stuff!

1. Only 1 entry per person.
2. Before winner is announced it will be confirmed first that they are a liker   of kiddilicious on facebook.
3. You have until Sunday 17th July to leave your comment.
4. Competition closes at 7pm Queensland time 17th July 2011
5. Winner will be drawn via random selection at random.org
6. Entry is valid worldwide
7. Winner will be announced here on my blog & also on kiddilicous' Facebook Page. 
7. This competition is run solely by kiddilicious & is in no way associated with Facebook or any other entity.

Best Of Luck Everyone & Many Thanks for your on going support of all things handmade.
kiddilicious
xx